How to repair asphalt cracks in driveway is a crucial maintenance task that homeowners often overlook but can significantly impact the longevity of the driveway. Understanding the different types of cracks, preparing for repair, and following the right techniques can make a world of difference in maintaining a smooth and durable surface.
This comprehensive guide will walk you through the steps involved in repairing asphalt cracks, from preparation and filling to sealing and preventive maintenance. By the end, you’ll have the knowledge and skills needed to tackle this common issue effectively and ensure your driveway remains in top condition.
Understanding Asphalt Cracks
Asphalt cracks in driveways can be a common issue that homeowners face. It is essential to understand the different types of cracks that can occur, their causes, and how weather conditions can impact their formation.
Types of Asphalt Cracks
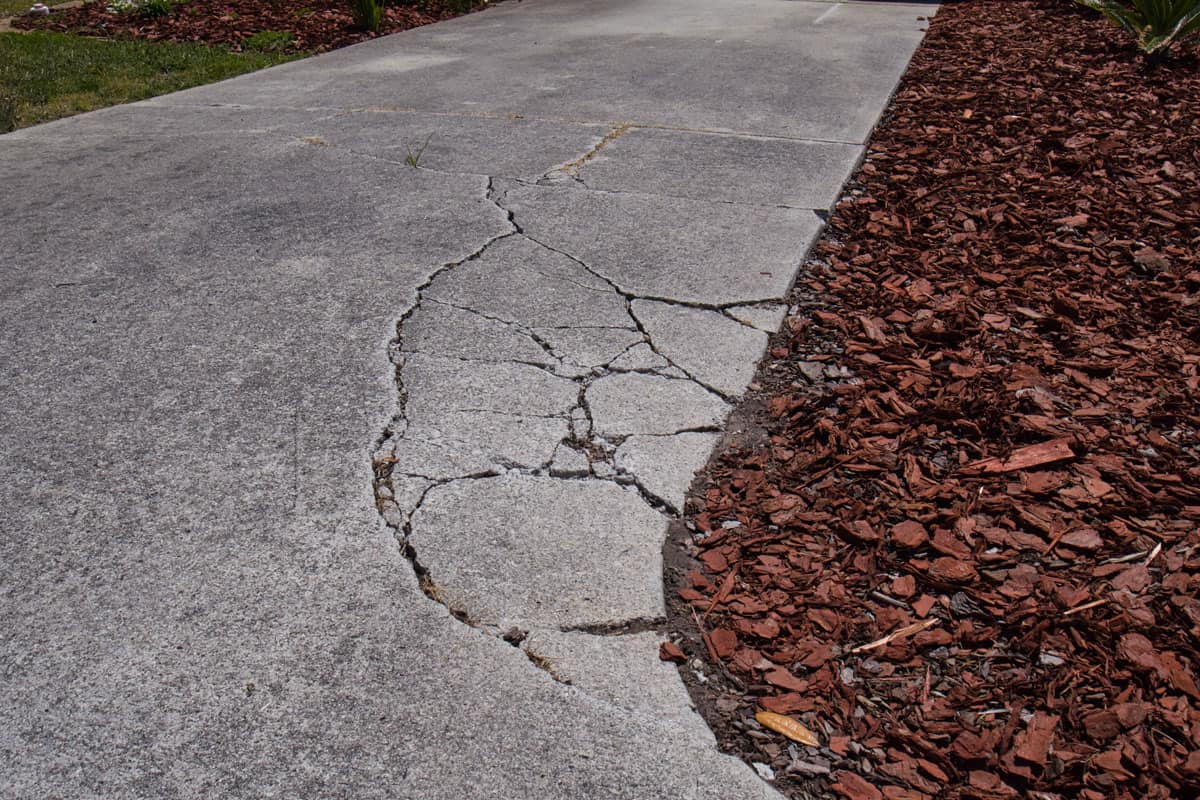
- 1. Alligator Cracks: These are interconnected cracks that resemble the skin of an alligator. They are usually caused by a weak base, heavy traffic, or poor drainage.
- 2. Linear Cracks: Straight line cracks that are often caused by poor installation, aging, or excessive weight on the driveway.
- 3. Potholes: Depressions in the asphalt caused by the expansion and contraction of water beneath the surface due to freezing and thawing cycles.
Common Causes of Asphalt Cracks
- 1. Poor Installation: If the asphalt was not properly installed, it is more likely to develop cracks over time.
- 2. Heavy Traffic: Constant heavy vehicles or machinery can put stress on the asphalt, leading to cracks.
- 3. Water Damage: Water seeping into the asphalt can weaken the base and cause cracks, especially during freeze-thaw cycles.
Impact of Weather Conditions
Weather conditions play a significant role in the formation of asphalt cracks. For example, extreme heat can cause the asphalt to expand, while cold temperatures can make it contract, leading to cracks. Additionally, rainwater can seep into cracks and freeze, causing them to widen.
Preparation for Repair
Before starting the repair process for asphalt cracks in your driveway, it is crucial to gather the necessary tools and materials and prepare the crack appropriately for effective repair.
Tools and Materials Needed
- Protective gear such as gloves and safety goggles
- Wire brush or broom
- Asphalt crack filler or patching material
- Crack sealant applicator or caulking gun
- Trowel or putty knife
- Propane torch or heat gun (optional)
Cleaning the Crack
Before applying any repair material, it is essential to clean the crack thoroughly. Use a wire brush or broom to remove any debris, dirt, or vegetation from the crack. This will ensure better adhesion of the repair material to the asphalt surface.
Widening the Crack
Widening the crack by using a wire brush or other suitable tool can help create a better surface for the repair material to bond with. By widening the crack, you provide more surface area for the filler or patching material to adhere to, resulting in a more durable and long-lasting repair.
Filling the Cracks
When it comes to repairing asphalt cracks in your driveway, filling them properly is crucial to prevent further damage and prolong the life of your pavement. There are different methods available for filling cracks, including using a cold patch, hot pour methods, or professional-grade products. In this section, we will discuss the steps involved in filling asphalt cracks with a cold patch, compare the effectiveness of cold patch repair with hot pour methods, and explore the pros and cons of using DIY sealants versus professional-grade products.
Filling Asphalt Cracks with a Cold Patch
- Clean the crack: Begin by removing any debris, dirt, or vegetation from the crack using a wire brush or air compressor.
- Apply the cold patch: Fill the crack with the cold patch material, making sure to overfill slightly to account for compaction.
- Compact the patch: Use a tamper or hand compactor to compact the cold patch material into the crack, ensuring a tight seal.
- Seal the crack: Once the patch is fully compacted, apply a sealant over the crack to protect it from moisture and further damage.
Comparison with Hot Pour Methods
- Cold patch repair is quick and easy to apply, making it a popular choice for DIY enthusiasts.
- Hot pour methods, on the other hand, involve heating the asphalt material before applying, which can provide a more durable and long-lasting repair.
- Hot pour methods are often used for larger cracks or areas with heavy traffic, where a more robust repair is required.
Pros and Cons of DIY Sealants vs. Professional-Grade Products
- DIY sealants are readily available at hardware stores and can be applied without professional help, making them a cost-effective option.
- However, DIY sealants may not provide the same level of durability or longevity as professional-grade products, which are specifically formulated for asphalt repair.
- Professional-grade products often come with warranties and are applied by trained professionals, ensuring a high-quality repair that lasts longer.
Sealing and Smoothing
When it comes to repairing asphalt cracks in your driveway, sealing the repaired crack is crucial in preventing further damage. Properly sealing the crack helps to protect the asphalt from water penetration and other environmental factors that can worsen the damage over time.
Sealing Process
- Clean the repaired crack thoroughly to remove any debris or loose particles that may prevent the sealant from adhering properly.
- Apply a quality asphalt crack sealant using a caulking gun or pour pot, ensuring the sealant fills the crack completely.
- Use a squeegee or trowel to spread the sealant evenly over the repaired crack, creating a smooth and uniform finish.
- Allow the sealant to cure according to the manufacturer’s instructions before allowing any traffic on the repaired area.
Smoothing Techniques
- After applying the sealant, use a trowel or putty knife to smooth out the surface and blend the sealant with the surrounding asphalt.
- Work the tool back and forth over the sealed crack to ensure a seamless finish and remove any excess sealant.
- For a professional-looking result, feather the edges of the sealant to blend it with the existing asphalt surface.
Tips for Professional Results
- Choose a high-quality asphalt crack sealant that is designed for durability and flexibility to withstand varying weather conditions.
- Work in small sections to ensure that the sealant is applied and smoothed out quickly before it begins to cure.
- Take your time to smooth out the sealant carefully, paying attention to detail to achieve a seamless and professional finish.
- Regular maintenance and resealing of cracks in your driveway can help prolong the life of your asphalt surface and prevent costly repairs in the future.
Curing and Drying
After filling and sealing the asphalt cracks in your driveway, it is crucial to allow the repair to cure and dry properly. This step ensures the longevity and effectiveness of the repair, preventing the cracks from reappearing.
Ideal Weather Conditions for Curing
- Optimal temperature: The ideal temperature for curing asphalt repairs is between 50°F and 75°F. Avoid performing the repair during extreme heat or cold, as it can affect the curing process.
- Avoid rain: Make sure there is no rain in the forecast for at least 24-48 hours after the repair. Water can interfere with the curing process and compromise the quality of the repair.
- Adequate sunlight: Sunlight helps speed up the curing process. Ensure that the repaired area receives sufficient sunlight during the curing period.
Common Mistakes to Avoid
- Walking or driving over the repair too soon: Avoid any foot traffic or vehicle traffic on the repaired area until it has fully cured. This can disrupt the curing process and damage the repair.
- Applying sealer too early: Wait at least 24-48 hours after filling the cracks before applying a sealant. Applying sealer too early can trap moisture and prevent proper curing.
- Not allowing enough time to cure: Patience is key when it comes to curing asphalt repairs. Make sure to follow the recommended curing time provided by the product manufacturer for the best results.
Preventive Maintenance
Regular maintenance is essential to prevent future cracks in your asphalt driveway. By following a few simple tips and applying a sealant, you can extend the lifespan of your driveway and keep it looking great for years to come.
Regular Maintenance Tips
- Inspect your driveway regularly for any signs of cracks or damage.
- Remove any debris or vegetation that may be growing in the cracks.
- Fill in small cracks promptly to prevent them from expanding.
- Keep your driveway clean by regularly sweeping away dirt and debris.
Benefits of Applying Sealant
Applying a sealant to the entire surface of your driveway can provide a protective layer that helps prevent cracks and damage caused by UV rays, water, and chemicals. It also enhances the appearance of your driveway and makes it easier to clean.
Maintenance Schedule
It is recommended to seal your asphalt driveway every 2-3 years to maintain its integrity and prevent cracks. Additionally, perform regular inspections and touch-ups as needed to address any minor issues before they become major problems.
Cost Considerations
When it comes to repairing asphalt cracks in your driveway, cost considerations play a significant role in deciding whether to opt for a DIY approach or hire professional services. Neglecting crack repairs can lead to more extensive damage, resulting in higher long-term expenses. Therefore, understanding the costs involved and exploring cost-effective solutions is crucial.
DIY vs. Professional Services
- DIY: The cost of repairing asphalt cracks on your own typically involves purchasing materials such as crack filler, sealant, and tools. While this option may seem more budget-friendly initially, it requires your time and effort.
- Professional Services: Hiring professionals to repair asphalt cracks can be more expensive upfront but ensures quality workmanship and saves you time. It may also result in a longer-lasting repair.
Long-Term Expenses
- Neglecting crack repairs can lead to further deterioration of your driveway, requiring more extensive repairs or even replacement in the future. Investing in proactive maintenance, such as timely crack repairs, can help you avoid these higher long-term expenses.
- Regular maintenance and small repairs can extend the lifespan of your asphalt driveway, saving you money in the long run by preventing major issues.
Cost-Effective Solutions
- Consider investing in high-quality materials for DIY repairs to ensure a lasting solution.
- Compare prices of different crack fillers and sealants to find cost-effective options without compromising on quality.
- Explore local contractors and request quotes to evaluate the cost-effectiveness of professional services based on your specific repair needs.
Safety Precautions
When repairing asphalt cracks in your driveway, it is essential to prioritize safety to prevent accidents and ensure a successful repair process. Here are some safety precautions to keep in mind:
Handling Repair Materials
- Wear appropriate protective gear such as gloves, goggles, and a mask to prevent skin contact, eye irritation, and inhalation of harmful fumes.
- Avoid direct contact with hot asphalt mix to prevent burns. Use tools like a trowel or gloves to handle the material safely.
- Work in a well-ventilated area or use a respirator when working with asphalt sealant to minimize exposure to potentially harmful vapors.
Disposal of Leftover Materials
- Avoid disposing of leftover asphalt repair materials in regular household trash. Check with your local waste management facility for proper disposal guidelines.
- If storing leftover materials for future use, make sure they are tightly sealed in their original containers to prevent spills and leakage.
- Keep children and pets away from the work area and stored materials to prevent accidental exposure or ingestion.
Common Mistakes to Avoid
When repairing asphalt cracks in driveways, it is crucial to avoid common mistakes that can compromise the effectiveness and longevity of the repair. Here are some key errors to steer clear of, along with solutions to rectify them and achieve a successful outcome.
Using the Wrong Repair Materials
One common mistake is using the wrong materials to fill asphalt cracks. Using incompatible or low-quality products can result in a subpar repair that may not last long.
- Ensure you use a high-quality asphalt crack filler specifically designed for the size and depth of the cracks.
- Read the manufacturer’s instructions carefully to ensure proper application and curing.
- Consult with a professional if you are unsure about the right materials to use.
Neglecting Proper Cleaning and Preparation
Another mistake is neglecting to clean and prepare the crack properly before filling it. Failing to remove debris, vegetation, and moisture can prevent the filler from adhering correctly.
- Thoroughly clean the crack using a wire brush, air compressor, or pressure washer to remove all debris and vegetation.
- Ensure the crack is completely dry before applying the filler to promote adhesion and longevity of the repair.
- Consider using a primer or bonding agent for better adhesion, especially for larger cracks.
Overlooking Proper Sealing and Smoothing
Improper sealing and smoothing of the filled cracks can lead to uneven surfaces and premature deterioration of the repair.
- Smooth out the filler evenly to create a flat surface that blends seamlessly with the surrounding asphalt.
- Use a trowel or putty knife to feather the edges of the filled crack for a smooth transition.
- Seal the repaired cracks with a high-quality asphalt sealer to protect them from water infiltration and further damage.
Skipping Preventive Maintenance
One common mistake is completing the repair without implementing regular preventive maintenance to prolong the life of the driveway.
- Regularly inspect the driveway for new cracks or damage and address them promptly to prevent extensive repairs in the future.
- Apply a fresh coat of sealant every few years to protect the asphalt surface from wear and tear.
- Keep the driveway clean and clear of debris to prevent moisture buildup and damage.
Expert Tips and Tricks
When it comes to tackling challenging crack repair scenarios in asphalt driveways, there are several expert tips and tricks that can help you achieve lasting results. By implementing innovative techniques and using quality products, you can enhance the durability of your repairs and ensure the longevity of your driveway.
Using Fiber Reinforced Crack Filler
One innovative technique for repairing asphalt cracks is to use a fiber reinforced crack filler. This type of filler contains strands of fiberglass or synthetic fibers that help reinforce the repair, making it more resistant to cracking and crumbling over time. By using this product, you can ensure a stronger and longer-lasting repair.
Proper Crack Preparation
Before filling the cracks in your asphalt driveway, it is essential to properly prepare the surface. Clean the cracks thoroughly, removing any debris or vegetation that may be present. Additionally, consider using a primer or bonding agent to ensure a strong adhesion between the filler and the asphalt. Proper preparation can significantly enhance the effectiveness of your repair.
Applying a Sealant After Repair
Once you have filled the cracks in your driveway, consider applying a sealant over the repaired areas. A quality sealant can help protect the asphalt from further damage caused by water, UV rays, and other environmental factors. By sealing the repaired cracks, you can extend the life of your asphalt driveway and prevent future issues.
Conclusive Thoughts
Don’t let asphalt cracks mar the appearance and functionality of your driveway. With the right tools, materials, and techniques, you can address these issues promptly and prevent costly repairs down the road. By staying proactive and following the tips outlined in this guide, you’ll enjoy a smooth, crack-free driveway for years to come.