Delving into how to repair cracked vinyl siding panels, this guide provides detailed insights on identifying, preparing, and executing repairs with precision and care. Whether dealing with small cracks or larger holes, this resource covers the essential steps to restore your vinyl siding to its former glory.
Understanding Vinyl Siding Cracks
Cracks in vinyl siding panels can occur due to various reasons, and understanding these causes is essential for effective repair and maintenance.
Common Causes of Cracks in Vinyl Siding Panels
- Prolonged exposure to harsh weather conditions such as extreme heat or cold.
- Impact from flying debris during storms or strong winds.
- Improper installation leading to stress points and structural weaknesses.
Different Types of Cracks in Vinyl Siding
- Hairline cracks: Small, fine cracks that may not be immediately noticeable but can worsen over time.
- Vertical cracks: Cracks that run vertically along the length of the siding panels.
- Horizontal cracks: Cracks that run horizontally across the width of the siding panels.
Potential Risks of Leaving Cracked Vinyl Siding Unrepaired
Leaving cracked vinyl siding unrepaired can lead to various issues, including:
- Water infiltration, causing damage to the underlying structure of the building.
- Pest infestations, as cracks provide entry points for insects and rodents.
- Aesthetically unpleasing appearance, reducing the curb appeal and value of the property.
Tools and Materials Needed
To effectively repair cracked vinyl siding panels, you will need a specific set of tools and materials to ensure a successful outcome. It is essential to gather all the necessary items before starting the repair process.
Tools Required:
- Vinyl siding zip tool: Used to unlock and remove the damaged siding panel.
- Caulking gun: For applying adhesive or sealant to the cracked area.
- Replacement vinyl siding panel: To replace the cracked or damaged section.
- Tin snips: Used to cut the replacement panel to the required size.
- Hammer: For securing the new siding panel in place.
- Utility knife: To trim the siding panel accurately.
Materials Needed:
- Vinyl siding cleaner: To clean the area around the cracked panel before repair.
- Adhesive or sealant: For bonding the cracked vinyl siding together.
- Screws or nails: To secure the replacement panel to the house.
- Replacement siding panel: To replace the cracked section with a new piece.
- Color-matching paint: To touch up any visible marks or areas after the repair.
Safety Equipment:
- Safety glasses: To protect your eyes from debris while working.
- Gloves: To safeguard your hands from sharp edges or materials.
- Dust mask: To prevent inhalation of dust or particles during the repair process.
Preparation Steps
Before beginning the repair of cracked vinyl siding panels, it is essential to properly prepare the area for the best results. This includes cleaning the cracked area thoroughly for improved adhesion and assessing the extent of the damage to determine the necessary repairs.
Cleaning the Cracked Area
Before repairing the cracked vinyl siding panels, it is crucial to clean the area to ensure proper adhesion of the repair materials. Use a mild detergent and water solution to remove any dirt, debris, or mold from the cracked area. Rinse the area thoroughly and allow it to dry completely before proceeding with the repair.
Assessing the Extent of Damage
It is important to assess the extent of the damage to the vinyl siding panels before starting the repair process. Determine if the cracks are superficial or if they extend deeper into the material. This assessment will help you determine the appropriate repair method and materials needed to fix the cracks effectively. Inspect the surrounding panels as well to identify any potential underlying issues that may have caused the damage.
Repair Methods
When it comes to repairing cracked vinyl siding panels, there are different methods that can be used based on the size of the crack or hole. Small cracks can be easily fixed with simple techniques, while larger cracks or holes may require more extensive repair work.
Repairing Small Cracks
Small cracks in vinyl siding panels can be repaired using specialized vinyl siding repair tape. This tape is designed to adhere to the surface of the siding and provide a seamless finish. To repair small cracks, simply clean the area around the crack, cut a piece of repair tape to size, and apply it over the crack. Press firmly to ensure a good bond with the siding.
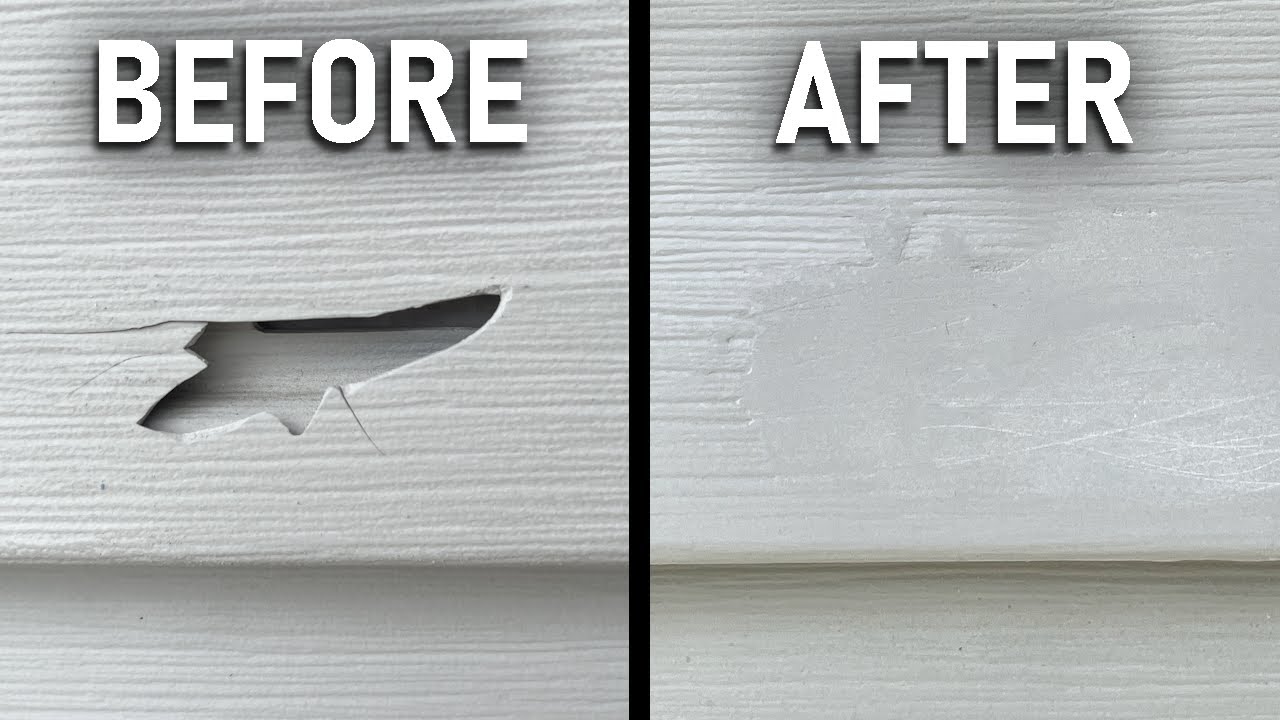
Fixing Larger Cracks or Holes
For larger cracks or holes in vinyl siding panels, a patching compound can be used to fill in the damaged area. Start by cleaning the area thoroughly and applying the patching compound according to the manufacturer’s instructions. Smooth out the compound and allow it to dry completely before painting over it to match the rest of the siding.
Comparing Repair Techniques
- Patching: Patching is ideal for larger cracks or holes and provides a more permanent solution to repair damaged vinyl siding.
- Caulking: Caulking can be used to seal small cracks and gaps in the siding, but may not be as durable as patching for larger repairs.
- Replacement: In cases where the damage is extensive, replacing the entire panel of vinyl siding may be necessary for a seamless repair.
Patching Cracks
When it comes to repairing cracked vinyl siding panels, patching small cracks is a common task that can help maintain the integrity of your siding. By using sealant or patching compound, you can easily fill in these cracks and prevent further damage.
To patch small cracks in vinyl siding, follow these steps for a seamless finish:
Application Method
- Clean the cracked area: Before applying the sealant or patching compound, make sure the cracked area is clean and free of any dirt or debris. Use a mild detergent and water to wash the area, and let it dry completely.
- Apply the sealant or patching compound: Using a caulking gun, apply the sealant or patching compound directly into the crack. Make sure to fill the crack completely and smooth out the surface for a seamless finish.
- Smooth the surface: After applying the sealant or patching compound, use a putty knife to smooth out the surface and remove any excess material. This will help blend the patch with the existing siding.
Matching Color and Texture
To ensure that the patch blends in seamlessly with the rest of the siding, it’s important to match the color and texture as closely as possible. Here are some tips to achieve a uniform look:
- Color matching: Take a sample of your siding to a local hardware store or home improvement center to find a matching color sealant or patching compound. You can also consult with a professional for color matching options.
- Texture matching: If your siding has a specific texture, try to find a sealant or patching compound that mimics the texture of your existing siding. This will help the patch blend in seamlessly and make it less noticeable.
- Test the patch: Before applying the patch to the cracked area, test it on a small, inconspicuous spot to ensure that the color and texture match the existing siding. Make any adjustments as needed before proceeding with the repair.
Caulking Techniques
When it comes to repairing cracks in vinyl siding, caulking can be a useful solution to seal and prevent further damage. Proper caulking techniques can help maintain the integrity of your siding and give it a professional finish.
Types of Caulking Materials
- Choose a high-quality exterior caulk specifically designed for siding repairs. Look for products labeled as weatherproof and paintable to ensure durability.
- Silicone-based caulks are flexible and provide excellent adhesion to vinyl siding, making them a popular choice for repairs.
- Polyurethane caulks are another good option, known for their durability and resistance to temperature changes.
Caulking Process for Vinyl Siding
- Start by cleaning the cracked area and removing any debris or loose pieces of siding.
- Cut the tip of the caulking tube at a 45-degree angle to create a small opening for precise application.
- Apply a continuous bead of caulk along the crack, ensuring it fills the entire gap and adheres to the surface.
- Smooth out the caulk with a putty knife or your finger to create a seamless finish.
- Allow the caulk to dry completely before painting over it to match the color of your siding.
Tip: For a professional-looking finish, use a caulk that closely matches the color of your siding to blend in seamlessly.
Panel Replacement
Replacing a damaged vinyl siding panel is a straightforward process that can help maintain the appearance and integrity of your home’s exterior. Here are the steps involved in replacing a damaged vinyl siding panel:
Measuring and Cutting the Replacement Panel
To ensure a proper fit, start by measuring the length and width of the damaged panel that needs to be replaced. Use these measurements to cut the replacement panel to the correct size. It’s important to cut the panel slightly shorter than the opening to allow for expansion and contraction due to temperature changes.
Securing the New Panel in Place
Once you have cut the replacement panel to size, slide it into place by hooking the bottom edge onto the panel below it. Make sure the panel is level and aligns with the adjacent panels. Secure the new panel by nailing it in place using roofing nails or screws. Be sure to leave a small gap between the nail head and the panel to allow for movement.
By following these steps, you can effectively replace a damaged vinyl siding panel and maintain the overall look and functionality of your home’s exterior.
Painting and Blending
After repairing cracked vinyl siding panels, it is essential to paint and blend the repaired areas with the rest of the siding to ensure a seamless finish and maintain the overall aesthetic appeal of your home.
Matching Paint Color and Finish
When selecting paint for your vinyl siding, it is crucial to match the color and finish of the existing siding as closely as possible. This will help in creating a cohesive look and prevent the repaired areas from standing out.
- Take a sample of the existing siding to the paint store to find the closest match.
- Choose a paint that is specifically formulated for vinyl surfaces to ensure proper adhesion and longevity.
- Consider the sheen of the paint to match the finish of the rest of the siding, whether it’s matte, satin, or glossy.
Achieving a Seamless Blend
To achieve a seamless blend between the old and new siding, follow these tips:
- Paint a small test area first to ensure the color match is accurate before painting the entire repaired section.
- Feather the edges of the painted area to blend it with the surrounding siding, creating a gradual transition.
- Apply multiple thin coats of paint rather than one thick coat to prevent buildup and ensure a smooth finish.
- Allow each coat to dry completely before applying the next one to avoid streaks or uneven coverage.
Preventive Maintenance
Regular maintenance and inspections are crucial in preventing cracks and damage to vinyl siding. By following these preventive maintenance tips, you can extend the lifespan of your siding and keep it looking great for years to come.
Inspect and Clean Regularly
- Regularly inspect your vinyl siding for any signs of wear, cracks, or damage.
- Clean your siding at least once a year to remove dirt, debris, and mold that can weaken the material.
- Trim trees and bushes near the siding to prevent branches from scratching or damaging the surface.
Protect from Environmental Factors
- Apply a protective coating or sealant to your vinyl siding to shield it from UV rays, moisture, and extreme temperatures.
- Install gutters and downspouts to direct water away from the siding and prevent water damage.
- During storms or harsh weather, secure loose panels and make repairs promptly to prevent further damage.
Maintain Proper Ventilation
- Ensure proper ventilation in your home to prevent heat and moisture buildup that can warp or crack vinyl siding.
- Inspect and clean vents, soffits, and eaves regularly to promote air circulation and prevent moisture retention.
Common Mistakes to Avoid
When repairing cracked vinyl siding, it’s important to be aware of common mistakes that could lead to further damage or an unsuccessful repair. By understanding these pitfalls, you can take the necessary precautions to ensure a successful outcome.
Mismatched Color Matching
One common mistake when repairing cracked vinyl siding is not properly matching the color of the replacement panel with the existing siding. This can result in a patch that stands out and detracts from the overall appearance of your home.
To avoid this mistake, take the time to carefully match the color of the new panel with the existing siding. You can bring a sample of the siding to a home improvement store to find the closest match possible.
Improper Caulking Technique
Another mistake to avoid is using improper caulking techniques when sealing cracks in the vinyl siding. Using too much caulk or applying it unevenly can lead to a messy and ineffective repair.
Ensure that you apply a thin, even bead of caulk along the crack and smooth it out with a caulk tool for a clean and effective seal.
Neglecting Proper Preparation
Neglecting proper preparation before repairing cracked vinyl siding is a common mistake that can result in a subpar repair job. Failing to clean the area, remove debris, or apply primer can lead to patchy results and a repair that doesn’t hold up over time.
Before starting the repair, make sure to thoroughly clean the area, remove any debris or loose pieces, and apply primer to ensure proper adhesion of the patch.
Using Incorrect Repair Materials
Using incorrect repair materials, such as using regular paint instead of vinyl-safe paint, is a mistake that can lead to a repair that doesn’t blend well with the existing siding. This can result in a patch that stands out and looks mismatched.
Make sure to use vinyl-safe paint that is specifically designed for use on vinyl siding to ensure a seamless blend with the existing panels.
Seeking Professional Help
When dealing with complex vinyl siding repairs or issues beyond your expertise, it may be necessary to seek professional assistance. Hiring a professional contractor can ensure the job is done correctly and efficiently, saving you time and potential costly mistakes.
Benefits of Hiring a Professional Contractor
- Experience and Expertise: Professional contractors have the knowledge and skills to tackle various siding repair challenges effectively.
- Quality Workmanship: Professionals can deliver high-quality results that are durable and long-lasting.
- Time and Cost-Efficiency: Hiring a professional can save you time and money in the long run by avoiding repeated repairs or replacements.
- Access to Tools and Materials: Professionals have access to specialized tools and materials needed for efficient repairs.
Tips for Selecting a Reliable Siding Repair Service
- Check Credentials: Ensure the contractor is licensed, insured, and has a good reputation in the industry.
- Ask for References: Request references from past clients to gauge the contractor’s work quality and professionalism.
- Get Multiple Quotes: Obtain quotes from multiple contractors to compare prices and services offered.
- Communication and Transparency: Choose a contractor who communicates effectively and is transparent about the repair process and costs involved.
- Warranty and Guarantee: Opt for a contractor who offers a warranty or guarantee on their work to provide peace of mind.
Final Conclusion
In conclusion, mastering the art of repairing cracked vinyl siding panels requires attention to detail, patience, and the right tools. By following the outlined steps and avoiding common mistakes, you can ensure a seamless repair process and maintain the integrity of your home’s exterior for years to come.