Roof leak repair guide for asphalt shingle roofs takes center stage as we delve into the crucial aspects of maintaining and repairing your roof. By following this comprehensive guide, you can ensure your roof remains in top condition, free from leaks and damage.
From identifying roof leaks to choosing between DIY and professional repairs, this guide covers everything you need to know to protect your home and extend the lifespan of your roof.
Importance of Roof Maintenance
Regular roof maintenance is essential for preventing leaks and ensuring the longevity of your asphalt shingle roof. By conducting routine inspections and addressing any issues promptly, you can avoid costly repairs and potential damage to your home.
Neglecting roof maintenance can lead to a variety of consequences, including water leaks, mold growth, and structural damage. A small issue, such as a missing shingle or a clogged gutter, can quickly escalate into a major problem if left unchecked. By staying proactive and maintaining your roof, you can prevent these issues from occurring.
Extending Roof Lifespan
Proper maintenance can significantly extend the lifespan of your asphalt shingle roof. By keeping your roof in good condition, you can avoid premature deterioration and ensure that it continues to protect your home for many years to come. Regular inspections, cleaning, and repairs as needed can make a big difference in the overall durability and performance of your roof.
Identifying Roof Leaks
Identifying a roof leak on an asphalt shingle roof is crucial to prevent further damage to your home. Early detection can save you money on costly repairs and ensure the longevity of your roof. Here is a detailed guide on how to spot a roof leak and common signs to look out for.
Common Signs of a Roof Leak
- Water Stains: Look for brown, yellow, or gray stains on your ceiling or walls, which indicate water is seeping through.
- Dripping Water: If you notice water dripping from your ceiling, it is a clear sign of a roof leak and requires immediate attention.
- Mold or Mildew: The presence of mold or mildew in your home, especially near the ceiling, can be a sign of excess moisture from a leaky roof.
- Missing or Damaged Shingles: Inspect your roof for missing, cracked, or curling shingles, as they can create openings for water to penetrate.
- Ceiling Bubbles: Bulging or sagging areas on your ceiling could indicate trapped water from a roof leak.
Early detection of roof leaks can prevent structural damage, mold growth, and costly repairs.
DIY vs. Professional Repair
When it comes to repairing a roof leak on your asphalt shingle roof, you may be faced with the decision of whether to tackle the project yourself or hire a professional. Each option has its own set of advantages and disadvantages, as well as safety considerations that need to be taken into account.
Advantages and Disadvantages of DIY Roof Leak Repair
- Advantages:
- Cost-effective option if you have the necessary skills and tools
- Flexibility to work on the repair at your own pace
- Sense of accomplishment from completing the repair yourself
- Disadvantages:
- Risk of improper repair leading to further damage
- Potential safety hazards if not experienced working at heights
- Time-consuming process, especially if unfamiliar with roofing repairs
Safety Considerations in Repairing a Roof Leak
- Always use proper safety equipment, such as harnesses, helmets, and non-slip footwear
- Avoid working on the roof in wet or windy conditions
- Be cautious of fragile or weak areas on the roof that may give way
Determining When DIY Repair is Feasible
- If the leak is small and easily accessible, DIY repair may be feasible
- If you have experience with roofing repairs and feel confident in your skills
- If you have the necessary tools and materials readily available
When Professional Help is Necessary
- If the leak is large or in a hard-to-reach area, it may be best to hire a professional
- If you are unsure of the extent of the damage or how to properly repair it
- If safety concerns or risks are involved in the repair process
Materials and Tools Needed
When repairing a roof leak on an asphalt shingle roof, it is essential to have the right materials and tools to ensure a successful and long-lasting repair. Here are the key items you will need:
Materials:
- Asphalt roof cement: Used to seal cracks and gaps in the shingles, preventing water from seeping through.
- Replacement shingles: In case any damaged shingles need to be replaced during the repair process.
- Roofing nails: To secure the replacement shingles in place.
- Roofing felt or membrane: Provides an extra layer of protection against leaks.
- Roofing sealant: Helps to waterproof areas around vents, chimneys, and other roof penetrations.
Tools:
- Hammer: Used to drive in roofing nails and secure shingles.
- Roofing nails: To secure the replacement shingles in place.
- Utility knife: For cutting shingles and roofing felt to the required size.
- Caulking gun: Used to apply roofing sealant in hard-to-reach areas.
- Roofing shovel or pry bar: Helps in removing damaged shingles without causing further damage.
Using high-quality materials is crucial for a successful roof repair. Opt for reputable brands and ensure that the materials are designed for asphalt shingle roofs to guarantee durability and effectiveness in preventing future leaks.
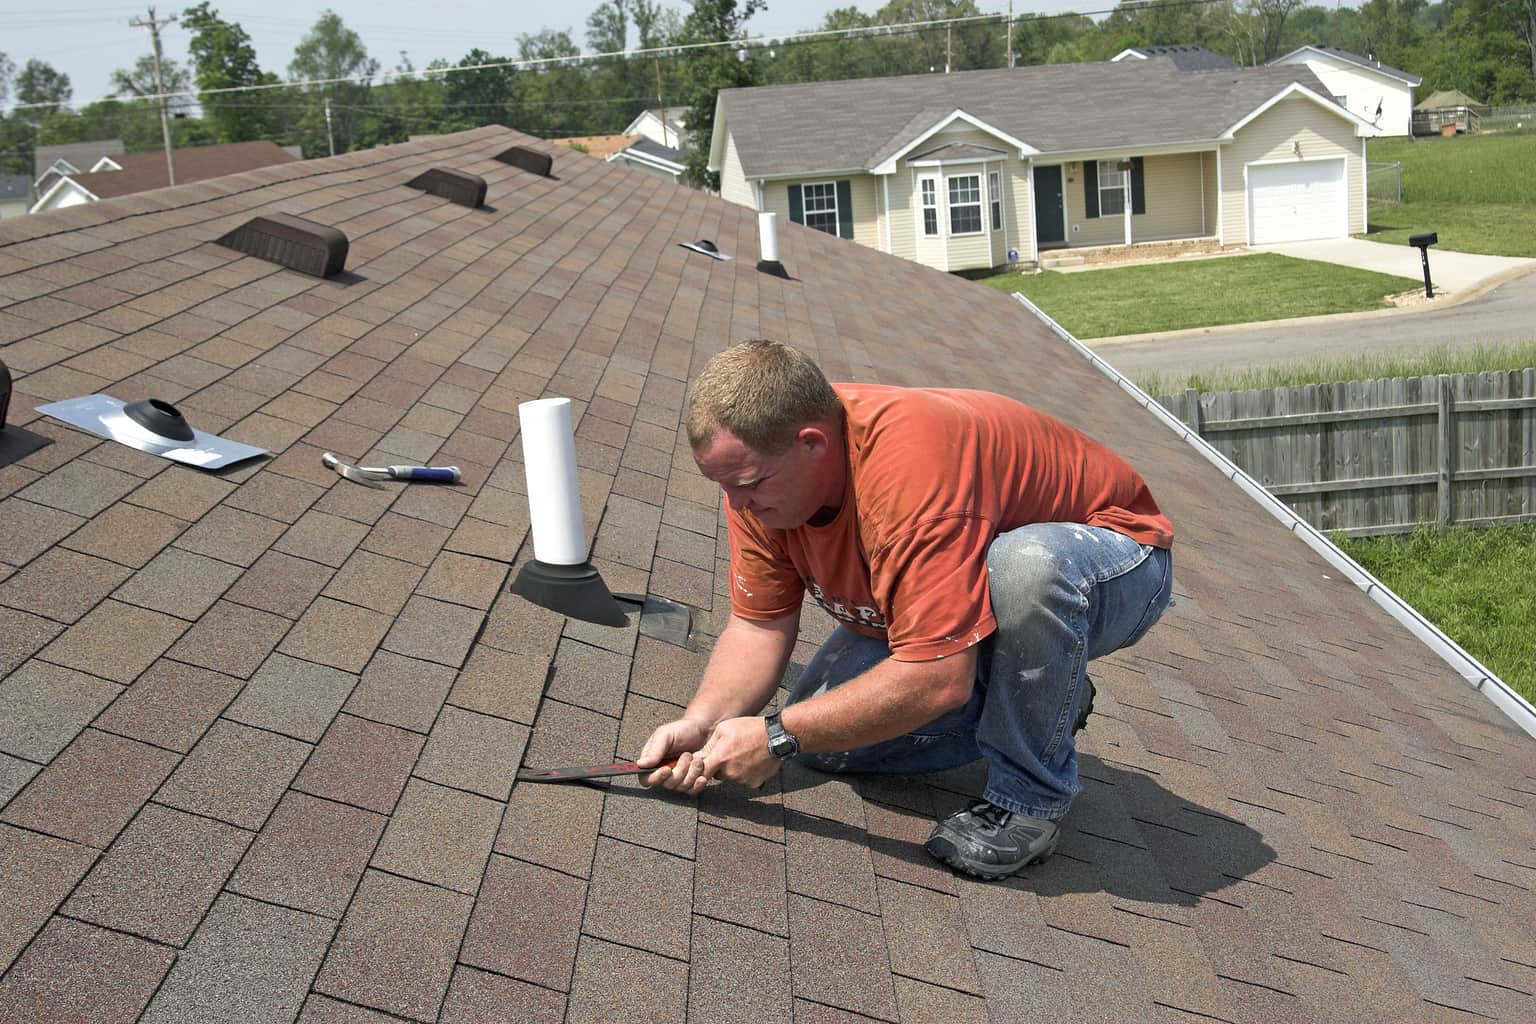
Repairing Asphalt Shingle Roofs
Repairing a roof leak on an asphalt shingle roof requires careful attention to detail and proper technique to ensure a long-lasting and effective repair. Proper preparation before starting the repair is crucial to the success of the project. Here, we will discuss the step-by-step process of repairing a roof leak on an asphalt shingle roof and share tips for ensuring a durable and effective repair that blends seamlessly with the existing roof.
Step-by-Step Repair Process
To repair a roof leak on an asphalt shingle roof, follow these steps:
- Locate the source of the leak by inspecting the attic for water stains or mold.
- Remove damaged shingles by lifting the edges and carefully pulling out the nails.
- Inspect the underlying roof deck for any signs of damage or rot.
- Replace any damaged underlayment or decking to ensure a solid foundation for the new shingles.
- Cut replacement shingles to size and secure them in place with roofing nails.
- Seal the edges of the new shingles with roofing cement to prevent future leaks.
- Inspect the entire roof for any other potential issues and address them as needed.
Importance of Proper Preparation
Proper preparation before starting the repair is essential to ensure a successful outcome. Cleaning the area, removing debris, and evaluating the extent of the damage are all crucial steps that cannot be overlooked. By taking the time to prepare the area properly, you can avoid costly mistakes and ensure a long-lasting repair.
Tips for a Durable and Effective Repair
– Use the same type and color of shingles as the existing roof to ensure a seamless blend.
– Apply roofing cement generously to create a watertight seal around the edges of the new shingles.
– Double-check the area for any missed damage or potential weak spots before completing the repair.
– Consider applying a protective coating or sealant to the entire roof to prevent future leaks and extend the life of the shingles.
– Regularly inspect and maintain your roof to catch any issues early and prevent costly repairs in the future.
Preventative Measures
Preventative measures are essential to reduce the risk of future roof leaks and avoid costly repairs. By implementing proactive roof care strategies, you can maintain the integrity of your asphalt shingle roof and prolong its lifespan.
Regular Inspections
Regular roof inspections are crucial in identifying potential issues before they escalate into major leaks. Inspect your roof at least twice a year, preferably in the spring and fall, to check for missing, damaged, or curling shingles. Look for signs of water damage, such as water stains on ceilings or walls, which could indicate a leak.
Maintenance Tasks
– Keep gutters and downspouts clear of debris to ensure proper drainage and prevent water buildup on the roof.
– Trim overhanging tree branches to prevent them from rubbing against the roof and causing damage.
– Check for signs of mold, moss, or algae growth on the roof and remove them promptly to prevent moisture retention.
– Seal any gaps or cracks around vents, chimneys, and skylights to prevent water infiltration.
Professional Inspection
Consider hiring a professional roofer to conduct a thorough inspection of your roof every few years. A trained eye can spot potential issues that may not be visible to the untrained homeowner, helping you address problems early on and avoid costly repairs down the line.
Seasonal Maintenance
– Before winter, ensure your roof is in good condition and free of any debris that could trap moisture and cause damage.
– In the spring, check for any damage caused by winter weather and address it promptly to prevent leaks during the rainy season.
– During the summer, inspect your roof for signs of wear and tear, especially after severe weather events like hail storms.
Dealing with Water Damage
Water damage caused by a roof leak can lead to serious issues if not addressed promptly and effectively. In this section, we will discuss how to handle water damage, the risks of untreated water damage, and strategies for drying and repairing affected areas.
Addressing Water Damage
When dealing with water damage from a roof leak, it is crucial to act quickly to prevent further damage and mold growth. Start by identifying and fixing the source of the leak to stop more water from entering your home.
Next, remove any standing water using a wet/dry vacuum or mop. Open windows and doors to improve airflow and aid in drying out the affected areas.
Use fans and dehumidifiers to speed up the drying process. It’s essential to dry the affected areas thoroughly to prevent mold growth and structural damage.
Potential Risks of Untreated Water Damage
Untreated water damage can lead to mold growth, structural damage, and health issues for you and your family. Mold can develop within 24-48 hours of water exposure, so it’s crucial to address water damage promptly.
Structural damage caused by prolonged water exposure can weaken the integrity of your home, leading to costly repairs and safety hazards. Additionally, water damage can attract pests and insects, further exacerbating the issue.
Strategies for Drying and Repairing Water-Damaged Areas
After removing standing water, focus on drying out the affected areas thoroughly. Use fans, dehumidifiers, and open windows to promote airflow and speed up the drying process.
Inspect walls, ceilings, and floors for signs of water damage, such as discoloration, peeling paint, or bubbling. Repair any damaged areas promptly to prevent further issues.
If the water damage is extensive or if mold is present, consider hiring a professional restoration company to ensure the damage is properly addressed and mitigated.
Cost Considerations
When it comes to repairing a roof leak on an asphalt shingle roof, cost considerations play a crucial role in decision-making. Understanding the potential costs involved and comparing DIY repairs with hiring a professional can help you budget and prioritize expenses effectively.
Breakdown of Costs
Repairing a roof leak on an asphalt shingle roof can involve various costs such as:
- Materials: Costs for asphalt shingles, underlayment, sealant, and other supplies.
- Labor: If hiring a professional, labor costs will be a significant part of the total expenses.
- Equipment: Tools needed for the repair, such as a ladder, hammer, nails, and safety gear.
- Additional Repairs: If the leak has caused water damage, additional repair costs may be required.
DIY vs. Professional Costs
- DIY Repairs: While DIY repairs may seem cost-effective initially, improper fixes can lead to more significant issues and higher costs in the long run.
- Professional Repairs: Hiring a professional ensures quality work, but it comes at a higher price due to labor costs.
- Tip: Consider your skill level, time availability, and the complexity of the repair when deciding between DIY and professional services.
Budgeting and Prioritizing
- Assess the urgency of the roof leak and prioritize repairs based on the severity of the damage.
- Obtain multiple quotes from reputable contractors to compare prices and services offered.
- Allocate a budget for roof maintenance and repairs to address issues promptly and prevent costly damage.
Environmental Impact
When it comes to roof leak repair for asphalt shingle roofs, it’s crucial to consider the environmental impact of the materials and methods used. From the production of repair materials to the disposal of old roofing components, every step can have consequences for the environment.
Eco-Friendly Alternatives
Opting for eco-friendly alternatives in repairing asphalt shingle roofs can significantly reduce the environmental footprint of the repair process. Some sustainable options include:
- Using recycled or salvaged materials for repairs
- Choosing low-VOC or non-toxic sealants and adhesives
- Implementing green roofing practices, such as installing a living roof or solar panels
Importance of Sustainable Practices
Embracing sustainable practices in roof maintenance and repair is essential for minimizing the impact on the environment. By prioritizing eco-friendly solutions, you can contribute to conservation efforts and reduce the overall carbon footprint associated with roofing projects.
Wrap-Up
In conclusion, this guide equips you with the knowledge and tools necessary to tackle roof leaks effectively. By implementing the preventive measures and repair techniques outlined here, you can safeguard your roof against potential damage and save on costly repairs in the future.